Cuckoo birds are known for laying their eggs in other birds’ nests and leaving their hatchlings for the other birds to feed. I see this as a good metaphor for third-party web analytics, with little snippets of someone else’s tracking code left on your website for you to feed with data. Analytics providers aggregate data across many websites and share only a subset of this data with you, plus they slow your site down with their tracking code. Your reports are cluttered with so-called Referer spam, you do not get an accurate visitor count, and I think you deserve better.
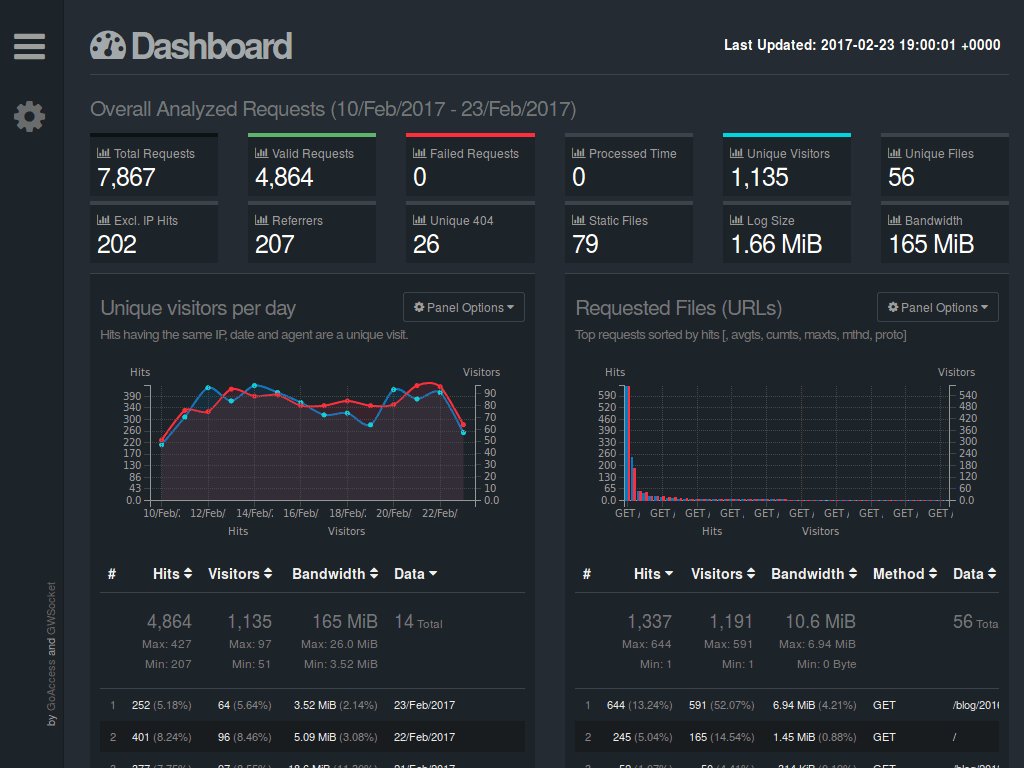
The GoAccess Dashboard
The simplest and most accurate way to track visits to your site is by checking server logs. Normally this is done over SSH in a terminal console, which is not anywhere near as pretty to look at as reports on a web page. This is where GoAccess excels, it is log processing software that can generate professional looking HTML reports full of detailed traffic statistics and graphs.
You can use it by itself, or you can use it alongside your existing third-party analytics service to audit their results. Because your statistics are generated from your own web server logs, you do not need to worry about under-counting visitors who disable JavaScript on untrusted websites, and you accurately count visitors who use ad-blockers. This is a significant percentage of visitors now, and the numbers are increasing.
Follow along with the steps below to learn how to install, configure, and use GoAccess on your web server to generate reports that update hourly and automatically exclude any garbage data from log spammers. To see an example of the finished product, visit my stats page for this blog. This is a low-traffic personal site so don’t expect to see huge numbers, but I’ve used this same setup for very large logs on client sites and it processed them quickly with low resource usage.
Prerequisites
For this guide I am starting with the assumption that your server is Ubuntu 16.04 and that you have a normal user with sudo privileges configured. See this tutorial on DigitalOcean for a quick guide on how to set that up if necessary. I’m also using the default text editor, Nano, but if you use a different editor or Linux distribution then you are encouraged to follow along and substitute the necessary commands as needed. Ubuntu is popular with beginners and I chose it because I want to make this easy for everybody.
Installation
GoAccess has a PPA with the latest stable version so that’s a no-brainer. Switch to your sudo login shell with sudo -i for install rights. We’ll use the simple Bash operator “&&” to chain the next commands together. This is best practice because it is a conditional statement, it means “if the first command executes successfully, then do the next one”. Add their key and PPA, then update software sources and install GoAccess with the following one-liner:
echo "deb http://deb.goaccess.io $(lsb_release -cs) main" | tee -a /etc/apt/sources.list.d/goaccess.list && wget -O - https://deb.goaccess.io/gnugpg.key | apt-key add - && apt update && apt -y install goaccessFor other Linux distros or for a custom build, see the GoAccess download page.
GoAccess Configuration
I’m using GoAccess with both Apache HTTP Server and Nginx, and the only custom pre-configuration I needed was for Nginx. If you are using Apache, skip ahead to the next section and use GoAccess’ options instead (explained later in this post). For Nginx create a custom GoAccess config override file with nano ~/.goaccessrc and paste the following three lines:
time-format %T
date-format %d/%b/%Y
log_format %h - %^ [%d:%t %^] "%r" %s %b "%R" "%u"
Create A GoAccess Directory
We will be re-using multiple files with GoAccess and the simplest thing to do is create a directory to keep everything in one place. Make a ‘goaccess’ directory at the root of your home directory with the command mkdir ~/goaccess and switch to that directory now with the command cd ~/goaccess/.
Web Directory Permissions
Since you already have a website and user set up this may be unnecessary, but if not the following command will set the proper permissions for your user to view logs and create new files for the web server to serve. Run this as your user, not as root. Note that it assumes your web server directory is /var/www and that your web server runs as the user www-data. These are the defaults on Ubuntu but change them if your environment is different.
sudo usermod -a -G adm "$USER" && sudo usermod -a -G www-data "$USER" && sudo chown -R www-data:www-data /var/www && sudo chmod -R g+w /var/www && sudo find /var/www -type d -exec chmod 2775 {} \; && sudo find /var/www -type f -exec chmod ug+rw {} \;If you changed permissions, you will have to log out and log back in for the changes to take effect.
Create A Sample index.html file to be replaced
To avoid any confusion later, let’s create the directory and an index file now, to be replaced later. Change the path at /var/www/???/stats to match where you want the file to appear.
mkdir /var/www/???/stats && echo "Hello World!" > /var/www/???/stats/index.htmlNow you should be able to visit the URL for your future stats page and see the simple “Hello World” message. If not, double check paths, permissions, and web server error logs because it’s going to be something simple.
GeoIP Database and Referer Spam Domains List
GoAccess can look up which city visitors accessed your site from if you have a GeoIP database available. Download a free one that MaxMind kindly makes available to the public with the command wget http://geolite.maxmind.com/download/geoip/database/GeoLiteCity.dat.gz && gunzip GeoLiteCity.dat.gz. Next we want a list of referer spam domains. The fine folks developing Piwik also hate referer spam and they have you covered. Download their list of referral spam domains with the command wget https://raw.githubusercontent.com/piwik/referrer-spam-blacklist/master/spammers.txt.
Collect Your Existing Log Data
If you have only one site on your server now, then collect all current and archived logs and extract the data to your master GoAccess log. If you have multiple sites you can still do this, but be aware that hits for all sites will be mixed together with no easy way to tell them apart.
For Apache:
zcat -f /var/log/apache2/access.log* > ~/goaccess/goaccess-master.log && zcat /var/log/apache2/access.log.*.gz >> ~/goaccess/goaccess-master.logFor Nginx:
zcat -f /var/log/nginx/access.log* > ~/goaccess/goaccess-master.log && zcat /var/log/nginx/access.log.*.gz >> ~/goaccess/goaccess-master.logNote the second command uses ‘»’ to append data to the existing log file the first command created. If you use a single ‘>’ you replace the file’s contents instead of adding to the existing contents.
We will run GoAccess from a ‘master’ log file in ~/goaccess and regularly extract visitor stats from the web server log to the master log file. Logs rotate less frequently than our hourly GoAccess update so we’ll automatically deduplicate the master log file after updating it.
Access Log Configuration
Do you host more than one website on your server? If not then skip ahead to the next section. If yes, GoAccess will work just fine but all your stats for each website will be presented together. That means that all visits to site-one.com/about and site-two.io/about will be combined as a single record for /about. You probably want unique stats per-website and the simplest way to achieve this is to use unique access logs for each website.
For Apache hosted websites change your access log by putting this in your VirtualHost configuration, changing EXAMPLE.LOG to your site (e.g. mywebsite.com.log):
CustomLog /var/log/apache2/EXAMPLE.LOGFor Nginx hosted websites change your access log by putting this in your server{} block, changing EXAMPLE.LOG to your site (e.g. mywebsite.com.log):
access_log /var/log/nginx/EXAMPLE.LOG;Crontab Scripts
Now make three scripts for cron to execute at regular intervals. I’ve included the cron scheduling example as comments at the end of each script for completeness and portability.
Run the command mkdir ~/goaccess/cron && cd ~/goaccess/cron to make a directory for our cron scripts and switch to it. Then run the command nano cron-goaccess.sh cron-geoip-updater.sh cron-referrer-spam.sh to create all three.
Paste the following into the first one, cron-goaccess.sh. Make sure you edit the top section so that the Bash variables match your server and home directory environment.
#! /bin/bash

# Change this to match the log file your server writes to
SERVER_LOG='/var/log/???'
# Change this to match the master log file GoAccess reads from
MASTER_LOG='/home/???/goaccess/goaccess-master.log'
# Change this to match the HTML page location to serve
HTML_OUT='/var/www/???/stats/index.html'
# Piwik spam domains file
BLACKLIST='/home/???/goaccess/spammers.txt'


# You probably don't need to change anything below, unless you want to set additional custom GoAccess options


# Append new log data to existing master log
cat $SERVER_LOG >> $MASTER_LOG

# Deduplicate log file in place (requires newer version of awk which Ubuntu 16.04 has)
awk -i inplace '!seen[$0]++' $MASTER_LOG

# This is the GoAccess command to process data and generate the stats page.
# Omit the "--config-file ~/.goaccessrc" if using Apache and replace with "--log-format=VCOMBINED"
goaccess -f $MASTER_LOG --config-file ~/.goaccessrc $(printf -- "--ignore-referer=%s " $(<$BLACKLIST)) --geoip-database ~/goaccess/GeoLiteCity.dat --agent-list --no-progress --output=$HTML_OUT

# Cron command for reference, run every hour to update reports
# @hourly ~/goaccess/cron/cron-goaccess.sh > /dev/null
Paste the following into the second one, cron-geoip-updater.sh
#! /bin/bash

# Change directory to where the existing file is
cd ~/goaccess/

# GoAccess needs the 'legacy' database format (new .mmdb doesn't work)
# Download only if remote file newer then local with --timestamping option
# Add '&& gunzip' at end because it's only executed if a new file is downloaded
wget --timestamping --output-file=cron/wget-cron.log http://geolite.maxmind.com/download/geoip/database/GeoLiteCity.dat.gz && gunzip --force GeoLiteCity.dat.gz

# Cron command for reference
# MaxMind updates free database on the first Tuesday of each month
# To run the above commands on the first Tuesday of each month at 4am
# 0 4 * * 2 [ `date +\%d` -le 7 ] && ~/goaccess/cron/cron-geoip-updater.sh > /dev/null
Paste the following into the third one, cron-referrer-spam.sh
#! /bin/bash

# Change directory to where the existing file is
cd ~/goaccess/

# Download only if remote file newer then local with --timestamping option
wget --timestamping --output-file=cron/wget-cron.log https://raw.githubusercontent.com/piwik/referrer-spam-blacklist/master/spammers.txt

# Cron command for reference
# The Piwik referrer spam domains list updates occasionally.
# To run the above commands at 3am every Monday
# 0 3 * * 1 ~/goaccess/cron/cron-referrer-spam.sh > /dev/null
Now don’t forget to make these three scripts executable. chmod +x cron-goaccess.sh cron-geoip-updater.sh cron-referrer-spam.sh
Crontab Scheduling
Cron runs on your server every minute and checks for instructions. Let’s give it something to do. Here we will run GoAccess to update the stats page every hour, run an update check for new referer spam domains every Monday, and run an update check for a new GeoIP database on the first Tuesday of each month, which is when MaxMind updates it. It’s impolite and a waste of resources to run these any more frequently.
First confirm that you are editing your user’s crontab because you don’t need to run these tasks as root. Run the command whoami and if it returns root then run the command exit to switch back to your normal user. To edit your user’s crontab run the command crontab -e. Paste the following three lines.
@hourly ~/goaccess/cron/cron-goaccess.sh > /dev/null
0 3 * * 1 ~/goaccess/cron/cron-referrer-spam.sh > /dev/null
0 4 * * 2 [ `date +\%d` -le 7 ] && ~/goaccess/cron/cron-geoip-updater.sh > /dev/null
Cron can email you if errors occur and the easiest way to set up server email is with ssmtp. There are many tutorials out there on how to set that up. Put MAILTO="you@example.com" (substituting your real address) once above the cron tasks if you want cron error emails, or put MAILTO="" to suppress all feedback. We are already suppressing messages about successful completion with > /dev/null after each task, so setting up email is helpful if you want to be alerted when problems happen.
A Note For German Readers
Willkommen! For readers in Germany (or anywhere else) that have a need to delete or anonymise IP addresses from logs, you can easily do so with this command.
sed --in-place --regexp-extended 's/\b(25[0-5]|2[0-4][0-9]|[01]?[0-9][0-9]?)\.(25[0-5]|2[0-4][0-9]|[01]?[0-9][0-9]?)\.(25[0-5]|2[0-4][0-9]|[01]?[0-9][0-9]?)\.(25[0-5]|2[0-4][0-9]|[01]?[0-9][0-9]?)\b/\1\.\2\.\3\.1/' ~/goaccess/goaccess-master.logThis command will find and replace the last octet in any valid IP address in your master log with the value .1, so for example the IP address 8.8.8.8 becomes 8.8.8.1 in your logs and GoAccess reports. This obviously affects the GeoIP lookups and combines different visits from 8.8.8.8 and 8.8.8.7 into visits from 8.8.8.1, but if that’s what you need then there is how to achieve it. Add that to your cron script before the deduplication step to automate it.
Final Thoughts
 That’s about it. Now you have a stats page that updates every hour automatically. It excludes referer spam and geolocates visitors. It’s a little more work than using third-party analytics but you get better results and I think you would be cuckoo not to try it.
To add one or more sites, just re-use the existing goaccess command in the cron-goaccess.sh cron script and adapt it to point at your other sites’ master logs file (and don’t forget to regularly update and deduplicate them from your web servers access log).
One thing to be aware of is that each hourly report is newly generated using the latest data. That means that GeoIP data from weeks or months ago may be incorrect since those visits from months ago are assigned today’s GeoIP data. This is acceptable to me but you may prefer to archive reports weekly or monthly as a workaround.
If you want to keep a list of domains to manually blacklist, you can create a new text file and define it as an extra Bash variable in the cron script, re-using and adapting the existing command like so: $(printf -- "--ignore-referer=%s " $(<$BLACKLIST_TWO)) (with “BLACKLIST_TWO=/edit/this/path/file.txt” up top with the other custom variables).
Neckbeards and noobs, feel free to contact me from the home page if you have any issues or ideas for improvement. Good luck and I hope you give this a try.
Update: Over time, you may wish to limit the duration of the report. Add the below example (source) to cron-goaccess.sh before the deduplication step, to limit logs to the previous 30 days.
awk -i inplace -v m1_ago=$(date -d"-1 month" +%s) \
'BEGIN{
   split("Jan Feb Mar Apr May Jun Jul Aug Sep Oct Nov Dec", month);
   for (i in month) m_nums[month[i]] = i
}
{ split(substr($4,2), a, "[/:]") }
mktime(sprintf("%d %d %d %d %d %d", a[3], m_nums[a[2]], a[1], a[4], a[5], a[6])) > m1_ago
' $MASTER_LOG